JDM folding mirror install
This installation covers the installating of JDM folding mirrors on the 92-95 Honda Civic.
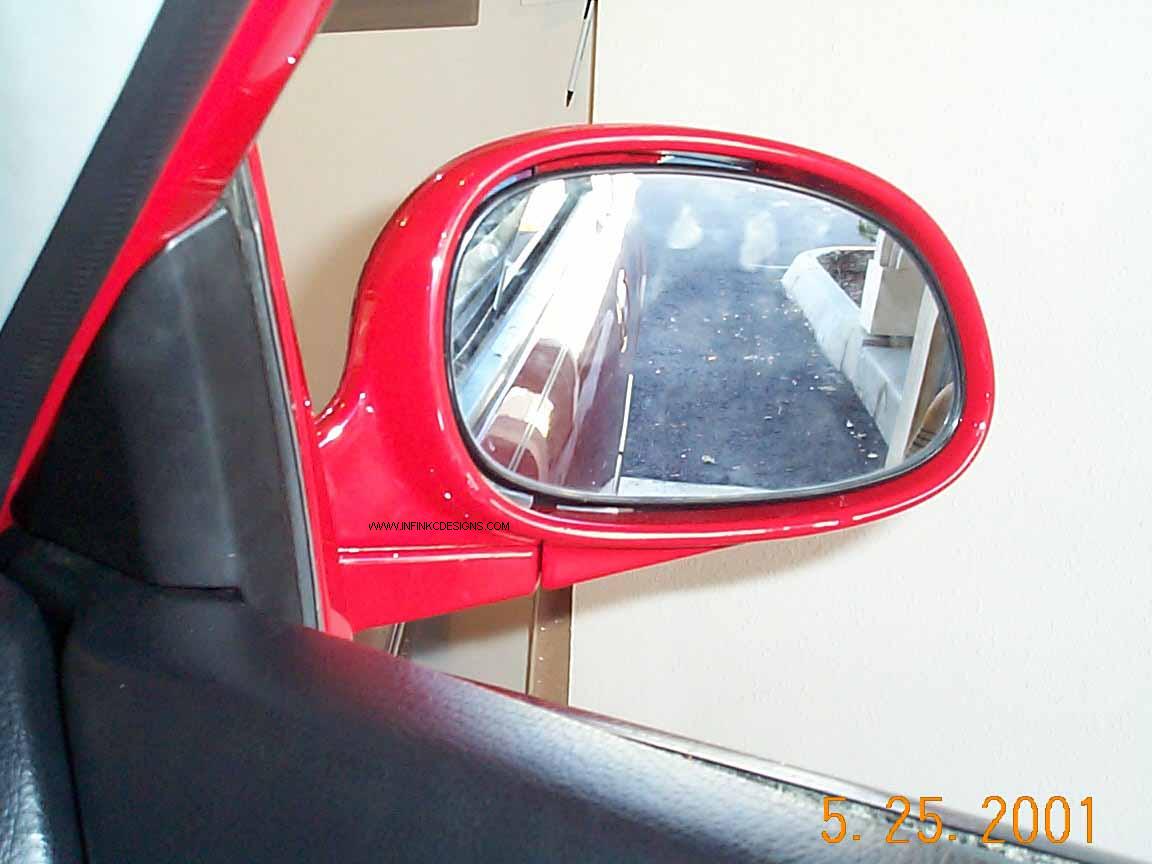
The JDM mirrors are different from USDM mirrors by the fact that they actually fold in electronically. This is because of the tight parking spaces in places in Japan. The mirror switch actually has a fold in button. Additionally, the passenger side mirror's magnification is not altered. The average cost of the mirrors (5/01) is about $175 with the switch included.
My mirrors did not come with the relay box. So this installation refers to the install without the relay box.
Difficulty Level: Moderate
The difficulty level of this install is moderate. If you have installed fog lights, a stereo system, or an alarm, you should be fine. The cumbersome part is routing the wiring into the door. Depending on how meticulous you are, this can be done very quickly but poorly or it can take you a long time but look very professional, not to mention being very reliable! I assume no responsibility for damages.
I highly recommend that you have a HELMS repair manual for this, or any, installation. I don't like to answer questions that can be easily solved by purchasing a repair manual. Trust me, it is worth every penny.
It is assumed that you have a repair manual. I will not explain things that are obvious.
Parts List
JDM mirrors
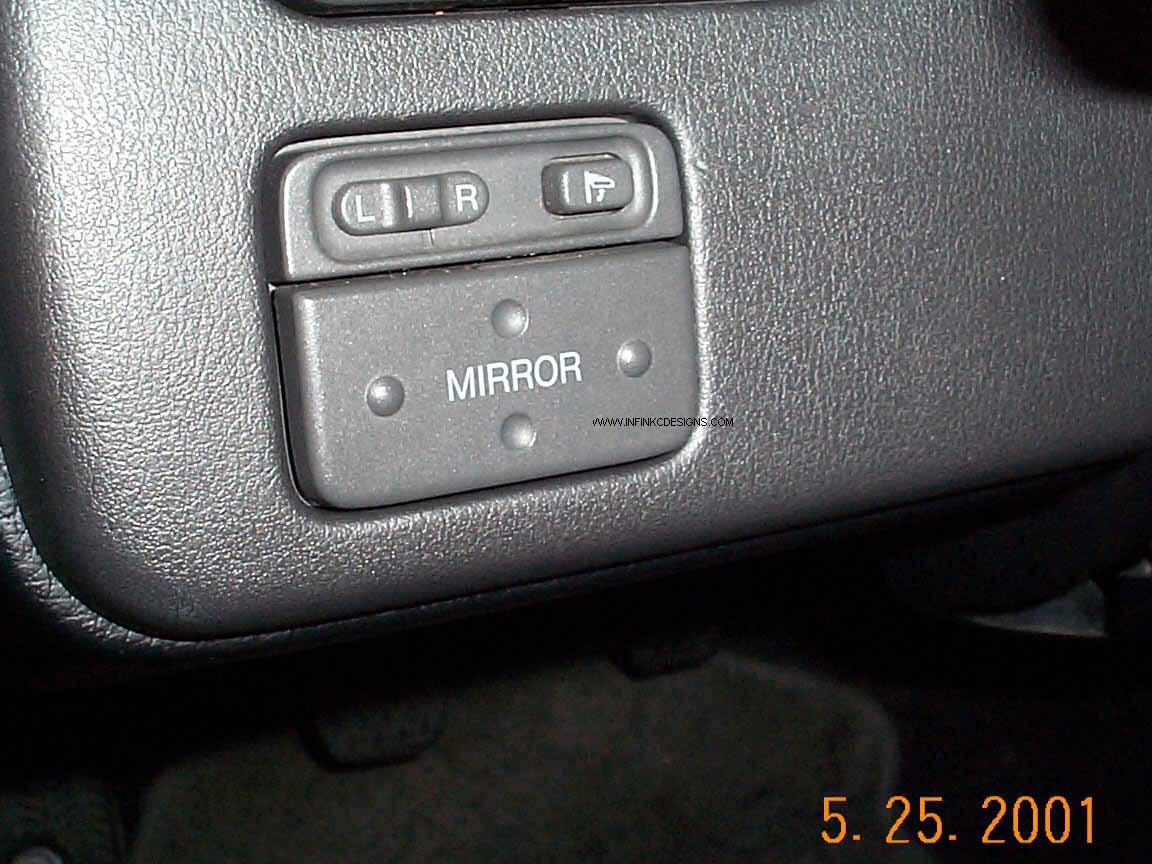
JDM mirror switch
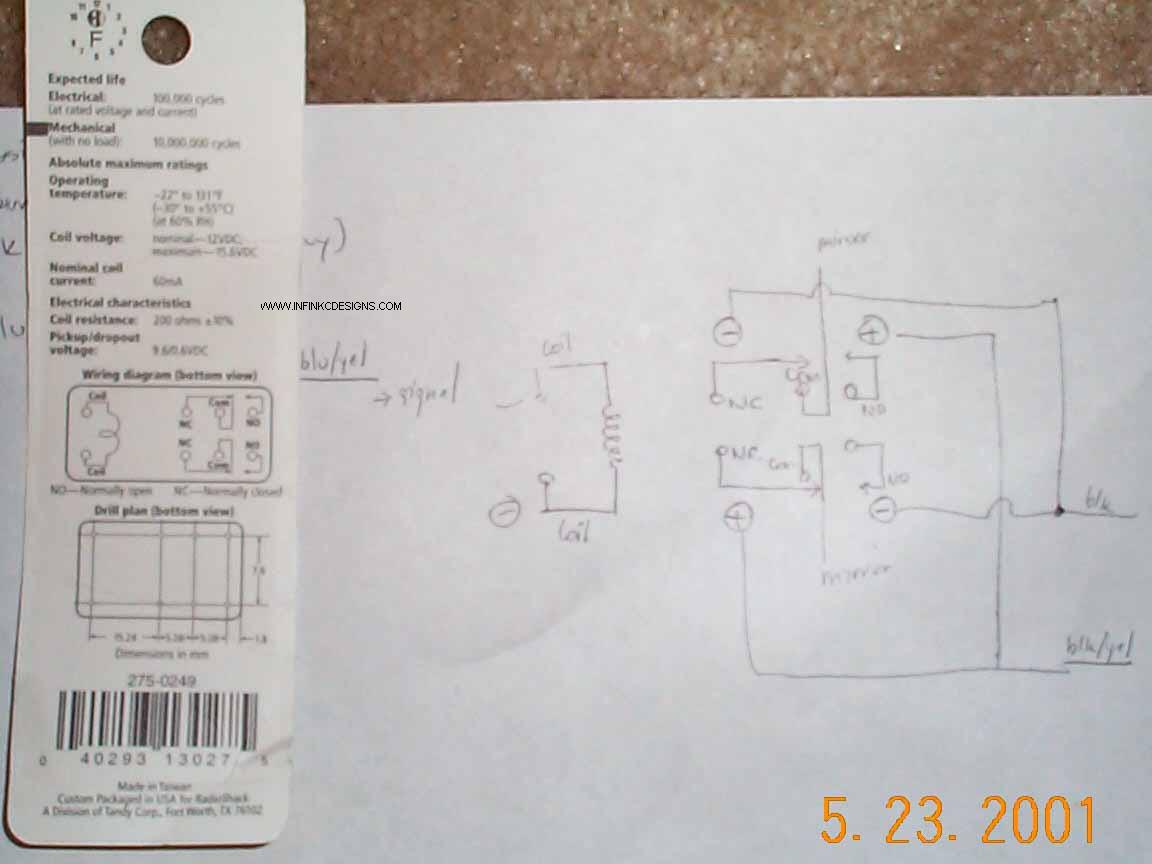
12V DPDT PC relay (Radio Shack 275-0249)
22 awg wire
Soldering iron and related tools
Electrical tape and/or heat shrink
Paper clip or 0.050" allen key
Drill
Wire loom
Instructions
Remove the 7.5 A fuse for the mirrors in the under-dash relay box first!
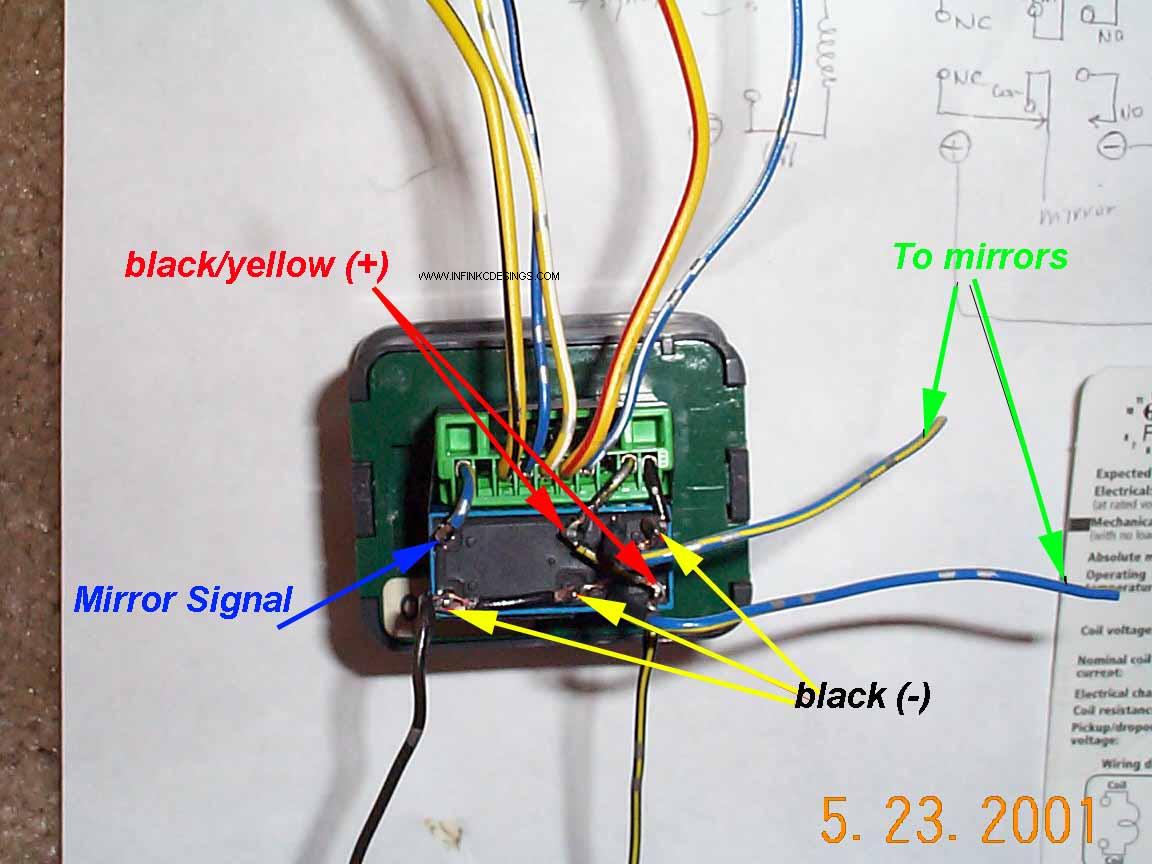
1. Prep the JDM mirror switch by wiring it as shown below. The relay allows the mirrors to fold out when the button is out and to fold in when the button is depressed. Notice that the relay is placed upsidedown below the harness clip. If you are unsure about the wiring of the relay, consult a professional.
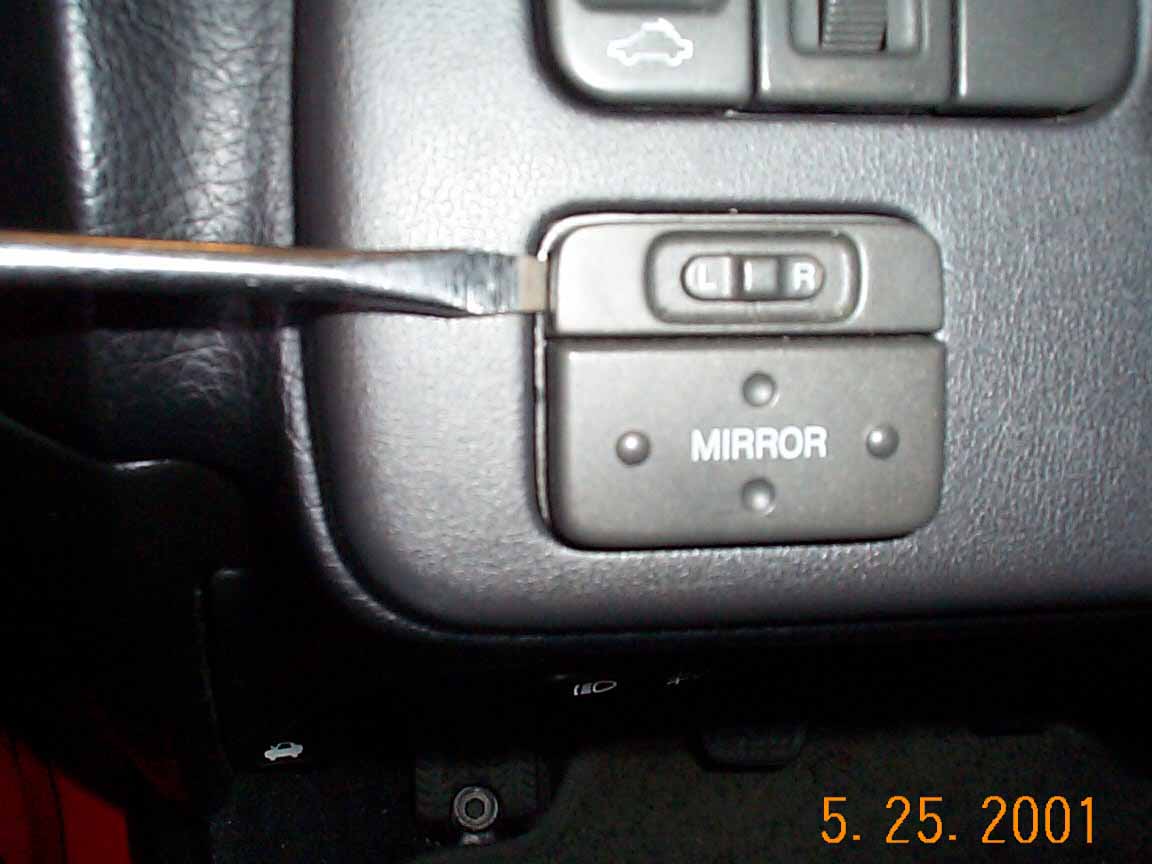
3. Remove the USDM mirror switch using a flathead screwdriver.
Here is a picture of the 2 different switches.

Notice that the pinouts are the same with the exception of the 3rd (blue w/ silver dots) and 4th (yel/red) pins being swapped and the last blu/yel on the JDM unit.
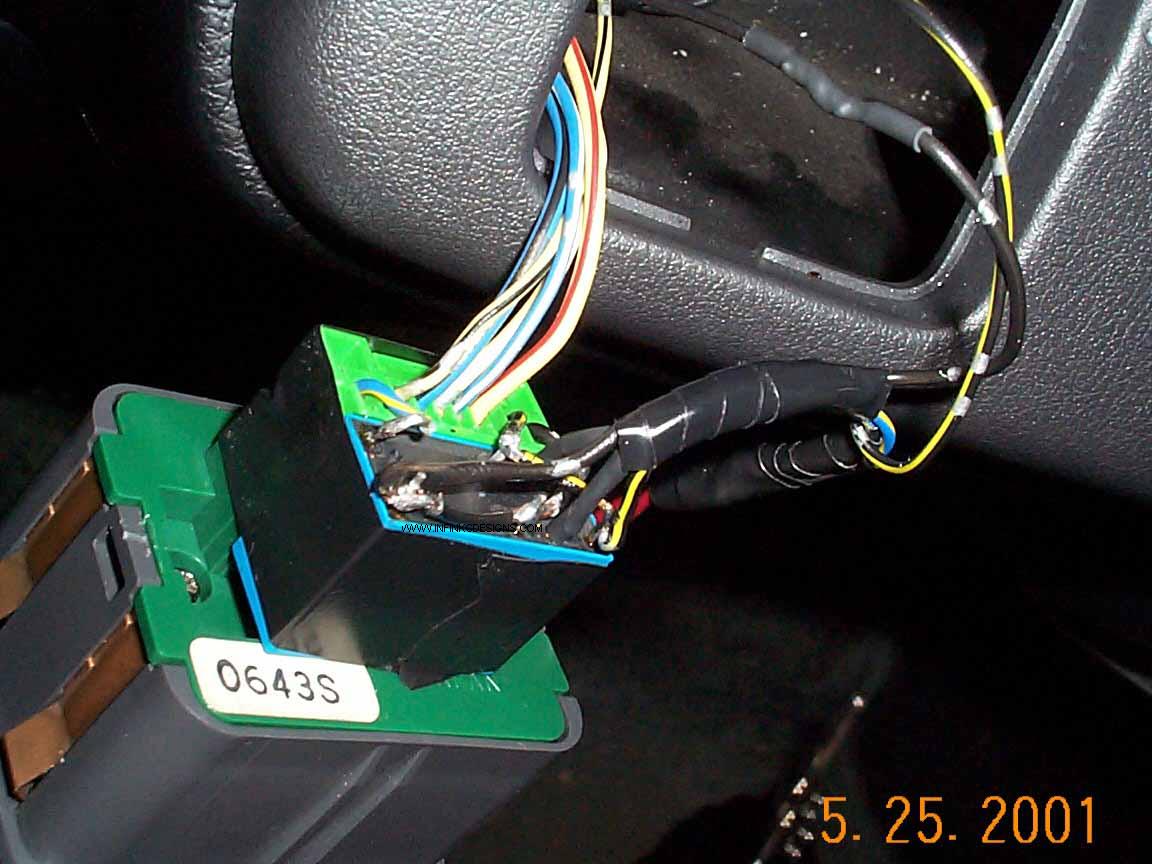
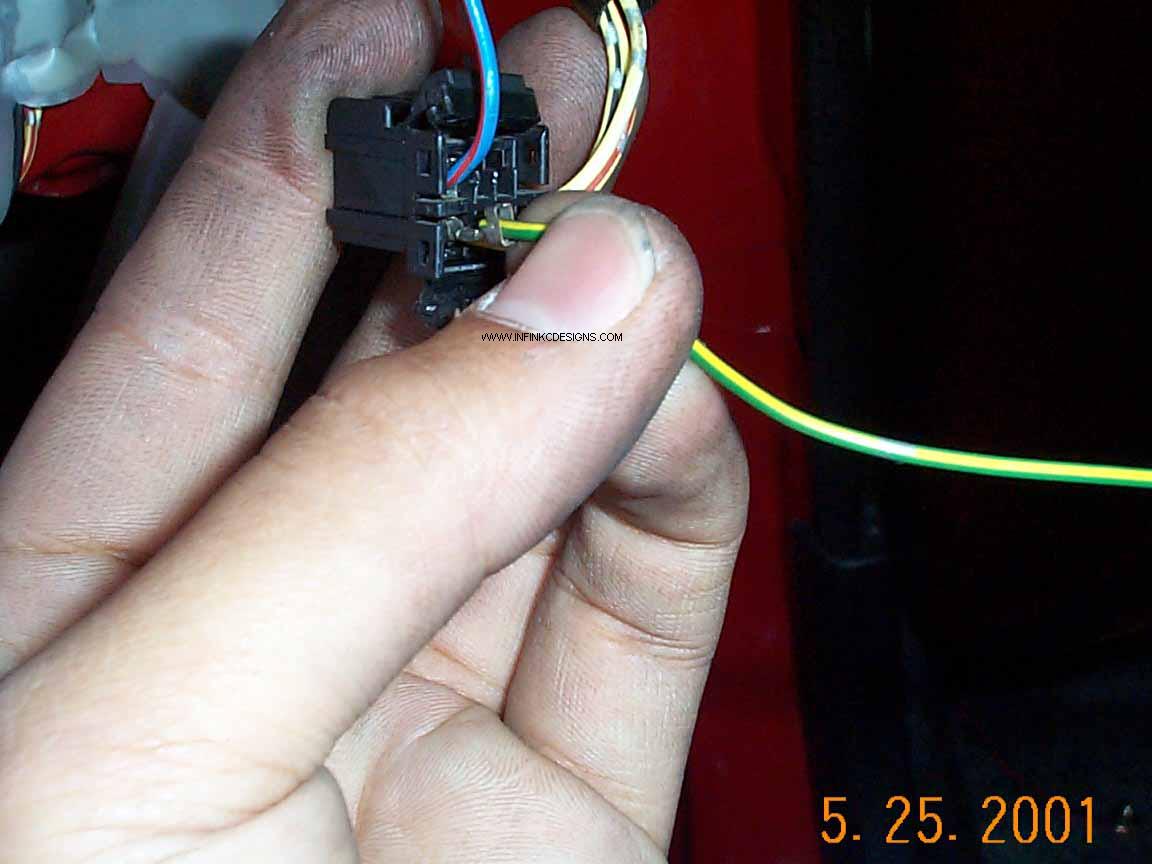
4. Swap the pins using the 0.050" allen wrench or a paper clip (a.k.a pin removal tool). You will need to pull back the terminal retainer and then insert the terminal removal tool into the front of the clip just below the terminal hole. The picture below illustrates what is actually going on. You insert the tool in order to push 2 pins back. This allows the terminal to slide out.

5. After switching all the pins, your harness clip should look like the one below. Use some electrical tape to stress relieve the bundle of wires. Do not plug this in yet.
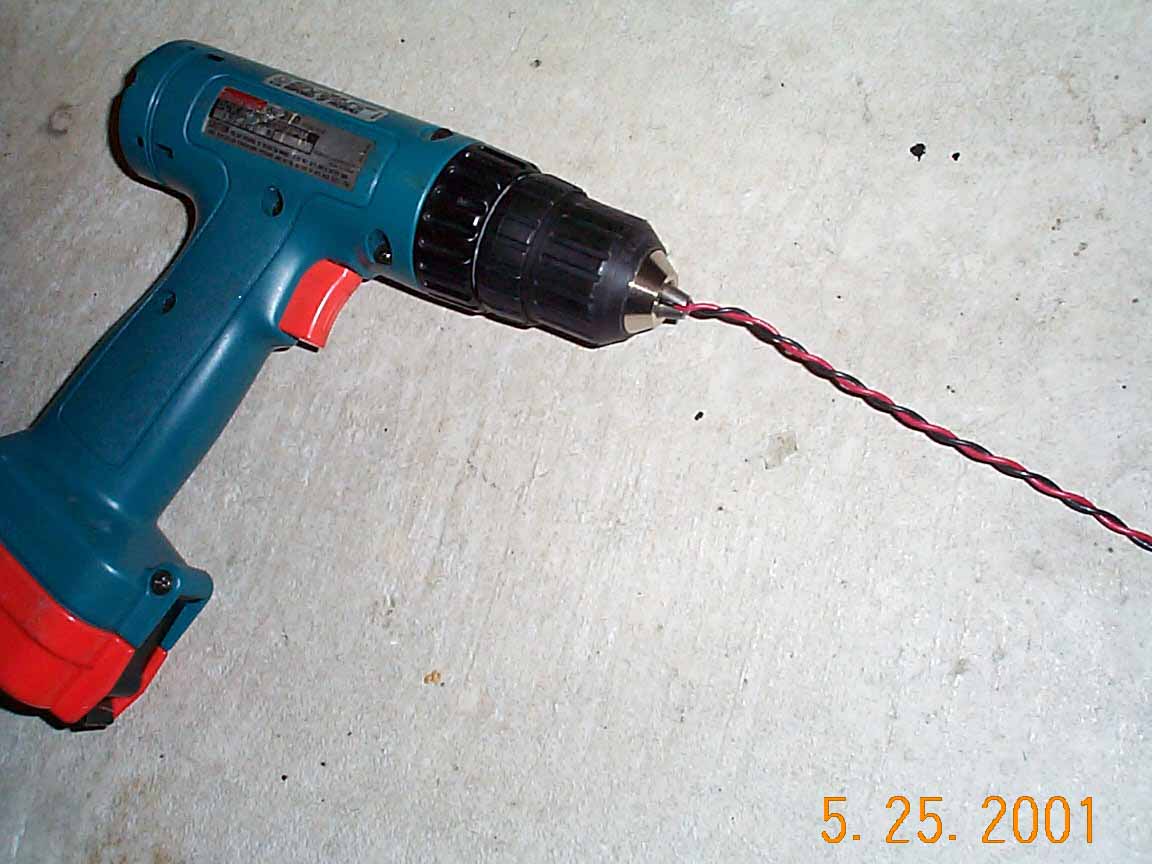
6. Get a pair of 22 awg wire (dissimilar colors, red and black in my case) and estimate the length required to run a pair of wire to each mirror. You should have one pair running from the switch to the driver side mirror and another one running to the passenger side mirror. Prep the wire by insert it into the chuck of a drill. Use the drill to twist the wires together. This will make handling the wire much easier.
7. Combine the red ends of the wires and solder them to one of the wires labeled "to mirrors" in step 1. Solder the 2 black wires to the other wire labeled "to mirrors" in step one.
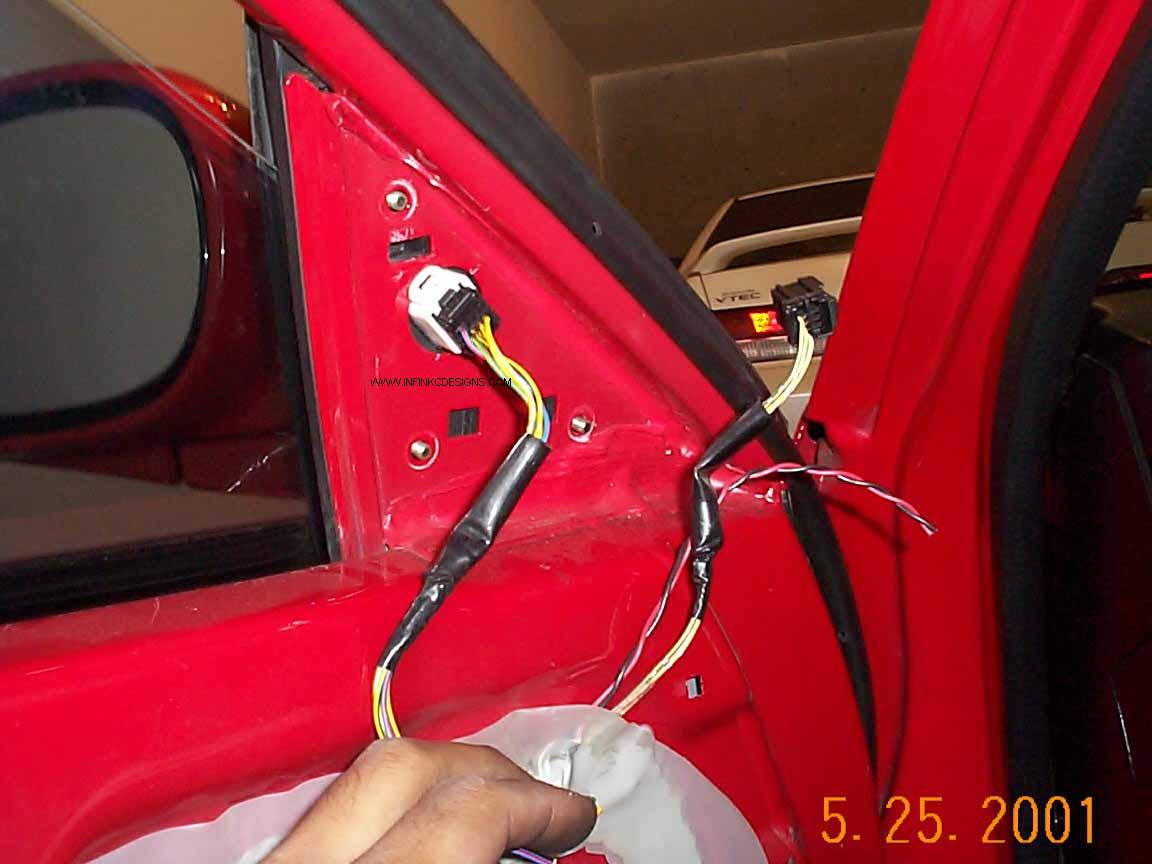
8. Remove the door panel.
9. Route the one set of wires to the driver side door and the other side to the passenger side door. This is the most difficult and/or more time consuming step. I highly recommend using wire loom throughout to deter chaffing.
10. Remove the mirror.
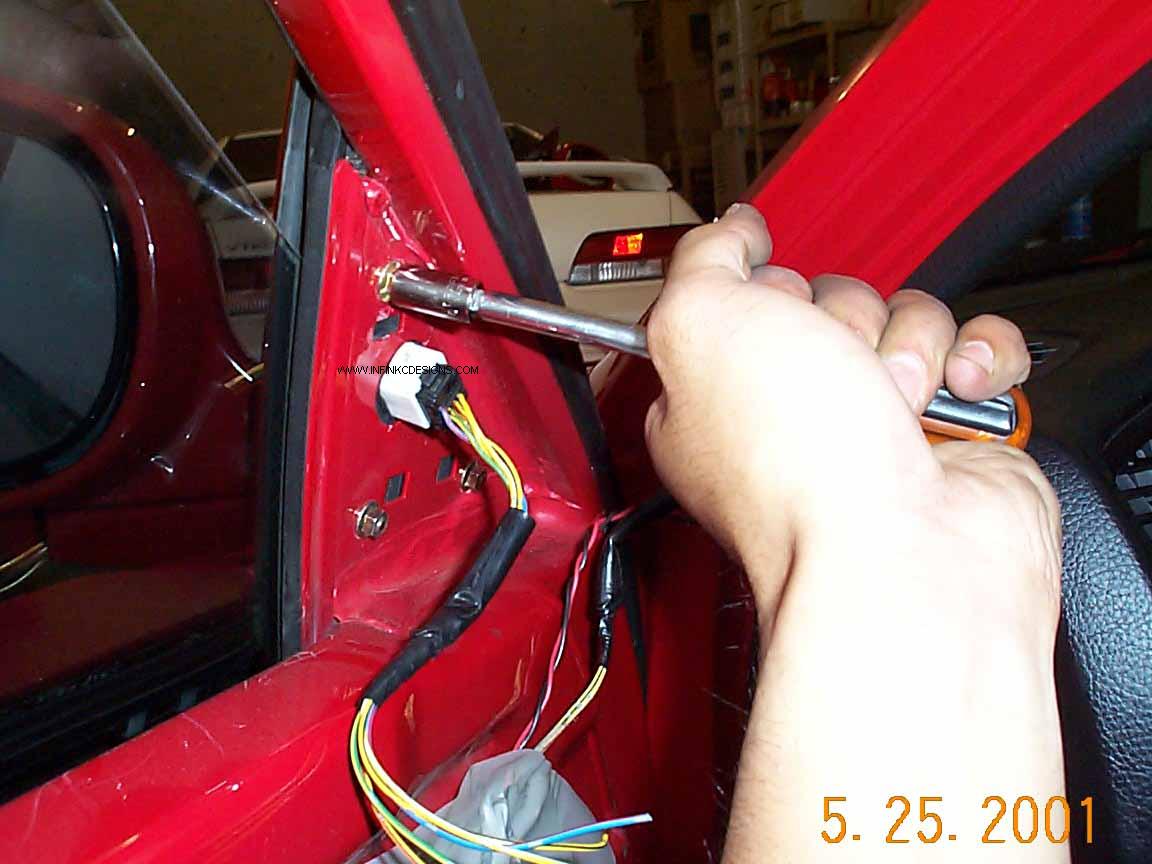
11. Remove the clip and swap the 2 dissimilar JDM wires to the USDM clip. The USDM clip has 3 wires. The JDM one has 5. To remove the terminals, you need to peel back the terminal retainer. Then insert the terminal removal tool into the BACK of the harness clip. Gently pull the terminal out.

12. Plug in the 7.5 A fuse. Turn the key to the IGN position.
13. With the 2 wires that you routed to the door, temporarily connect one to one wire and the other to the other wire. If the mirror folds in, you need to swap them. After finding the orientation that causes the mirrors to fold out, depress the mirror fold in button the ensure that it works. If it works, solder the wires and wrap them.
14. Remove the fuse and key.
15. Repeat for the other side.
Congratulations!
Thanks for taking the time to read this. I hope this will aid you in your install. Email me if you have any questions.
So do these mirrors do any good for me? Well, I do admit that I hardly use them but there have been some instances where they came in handy. One note though is that the magnification is the same on both sides. It makes objects appear farther away in order to see more. Combined with the fact that the adjustability is limited because of the LHD vs. RHD configurations, the mirrors are not as functional as the USDM units.
Writeup from Mark Paco